 |
Layer MasksLayer masks are fairly easy to use, but a little mysterious. They can, however, produce some pretty spectacular results and are worth playing around with. I'm going to use a layer mask with a gradient fill to blend a color photo with a black and white "drawing". The drawing will be created from the photo using the Gallery Effects plug-ins. Let's get started. Open a graphic file, I used a photo of a model I worked with a couple of years ago. 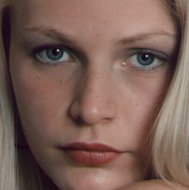 Using Select, All select the whole image. Then Edit, Copy and Edit, Paste Layer. We could go through the steps of naming this layer, etc. but, since this is a very quick job, we can leave the name and other options at the default settings. Since, as I stated above, I wanted the effect of a photo merging into a drawing, I ran the Gallery Effects "Graphic Pen" on this new layer.  I had the default foreground and background colors set (i.e. black and white, respectively). Okay, here comes the magic part :) Click on the layer options button. That's the little black triangle in the upper right corner of the layers palette. Select "Add Layer Mask". A layer mask should now be active. You'll see a new thumbnail with the active layer. Choose the gradient tool from the tools palette. Position the cursor somewhere near the middle of the image and, while holding down the shift key, drag the pointer to the right side of the image. What we've done is create a mask that allows the background layer (the one with the color photo) to blend through to the top layer (the one with the black and white drawing). 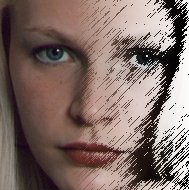 |
|
|
|
|
|
|
|
|
CIPART
2000
|